🎌 Translating Acter with Weblate
This is a quick guide on how to start contributing translations to the Acter App using the Weblate online tool.
Submitting suggestions without an Account
If you only have a suggestions for a specific string or want to offer a few single translations for the App, you can navigate to the Acter App project on weblate.acter.org, select the language with the ✏️ icon and start submitting suggestions totally anonymously:
These suggestions are not submitted to the translations directly but will be shown to registered translators when they look at the string (or use the review tool) and they can pick it up with just a click.
If you are interested in actually submitting translations and contribute a bigger corpus of string, you should create an account
Creating an Account
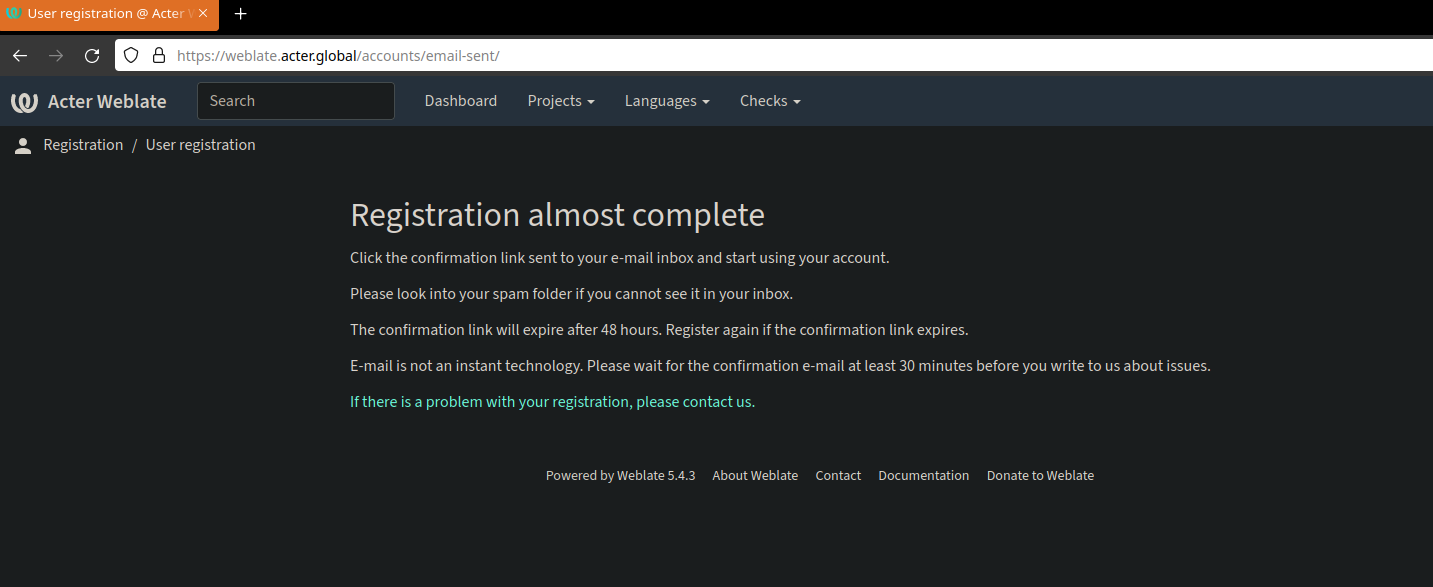
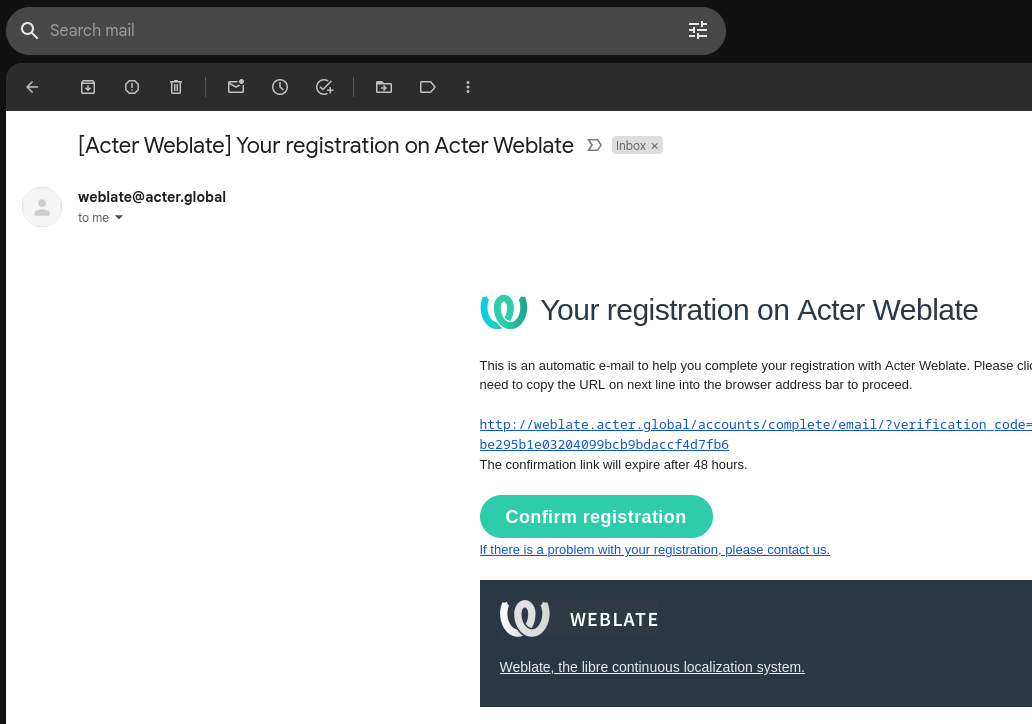
To crate an account just go got weblate.acter.global and click on the register button. All you need is a username, your email address and the full name to show to others. After you’ve filled the form, the system will send you an email with a link you need to click to confirm the account registration.
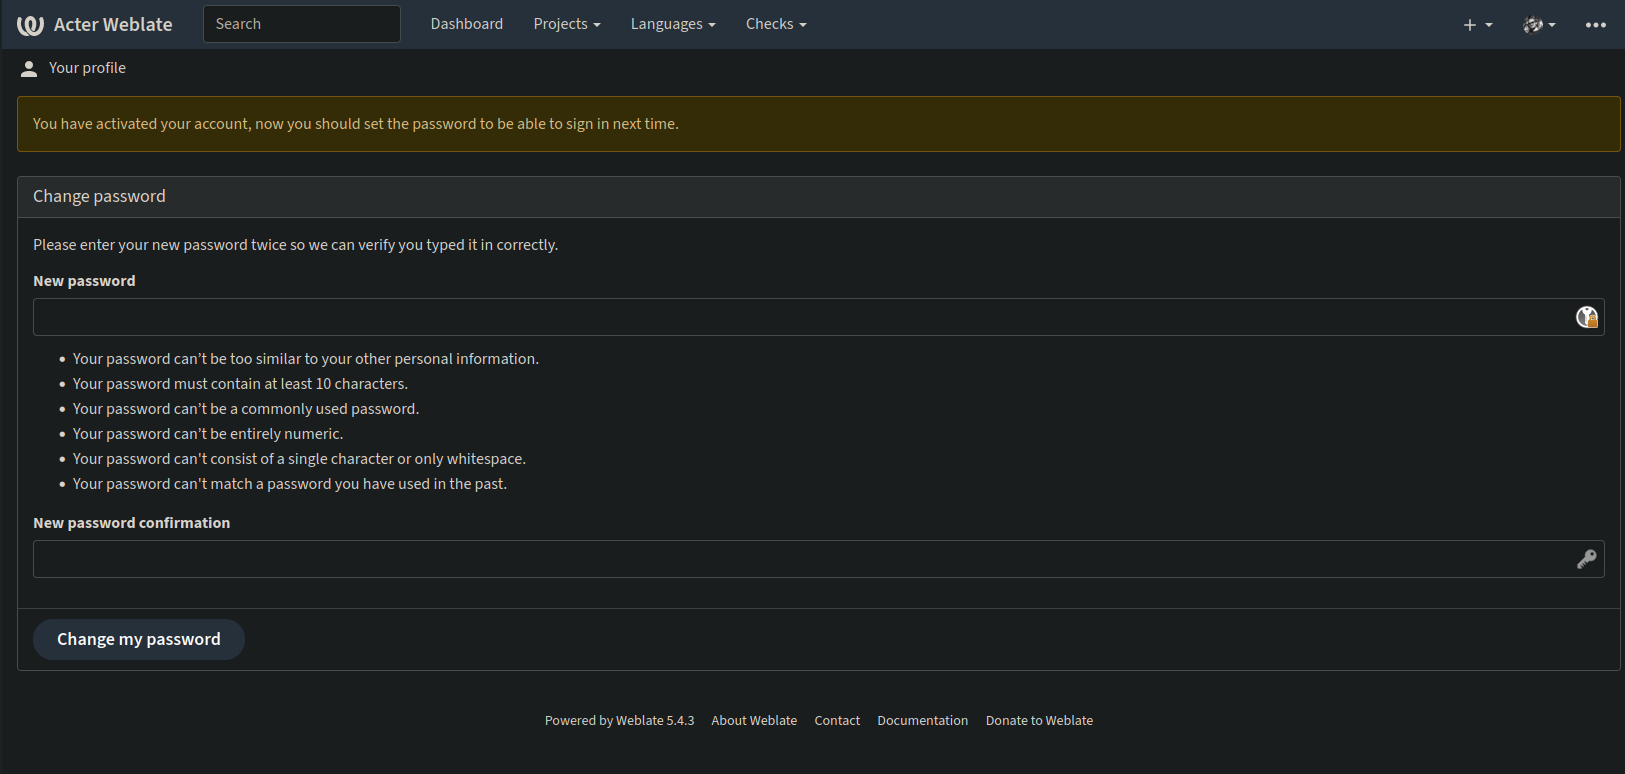
Once logged in you’ll be asked to add a password to your account and you are offered to change the settings.

Add Acter Project to your dashboard
After completing the registration process, we suggest to navigate to the Acter App project and use the top right to mark it as a favorite. That will add the project to your dashboard and makes it easier to find on the next login (as shown in the next video below)
Adding translations to an existing language
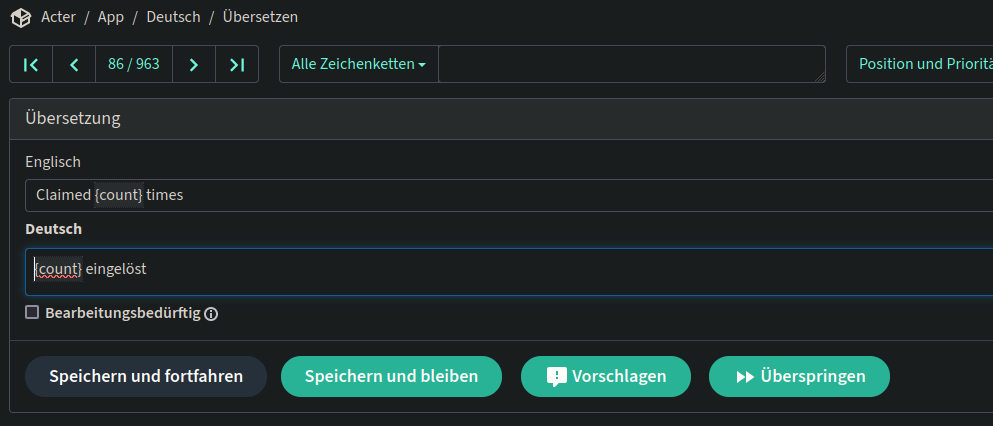
The easiest is to start by adding translations to an existing language. For that you just navigate to the Acter App language listing and click the ✏️ icon next to the language you’d like to add translations to. This will open the translation editor on the next string that needs a translation. The editor might appear a bit daunting with all its options at first, but all you need to focus on is the top form: in the first line you’ll find the English version of the String, below that you are asked to enter the translation.
Once you have added that you can click ‘submit and continue’ for the next one, and so on. If you don’t know a translation or don’t feel comfortable submitting one for whatever reason, you can always click “skip” to jump to the next one. The editor offers a lot more features, including a zen-mode, to make the process as efficient as possible and you can learn more about it in their documentation, but for the simple use case, this is all you need to know for now.
Favorating the project and adding strings to an existing translations
These strings will automatically be included in the next release submitted :) .
Starting a new language
In order to start a new language translation, just navigate to the language listing of the Acter App project and press the ➕ button to open the add-language editor. Just select the language you want to add, it might takes a moment to load but then you’ll find yourself in the language overview page and can either translate right from there or go through the app language listing and start translating!
Congrats on adding a new language
Tips & Tricks
What are these {code}things that show up sometimes?
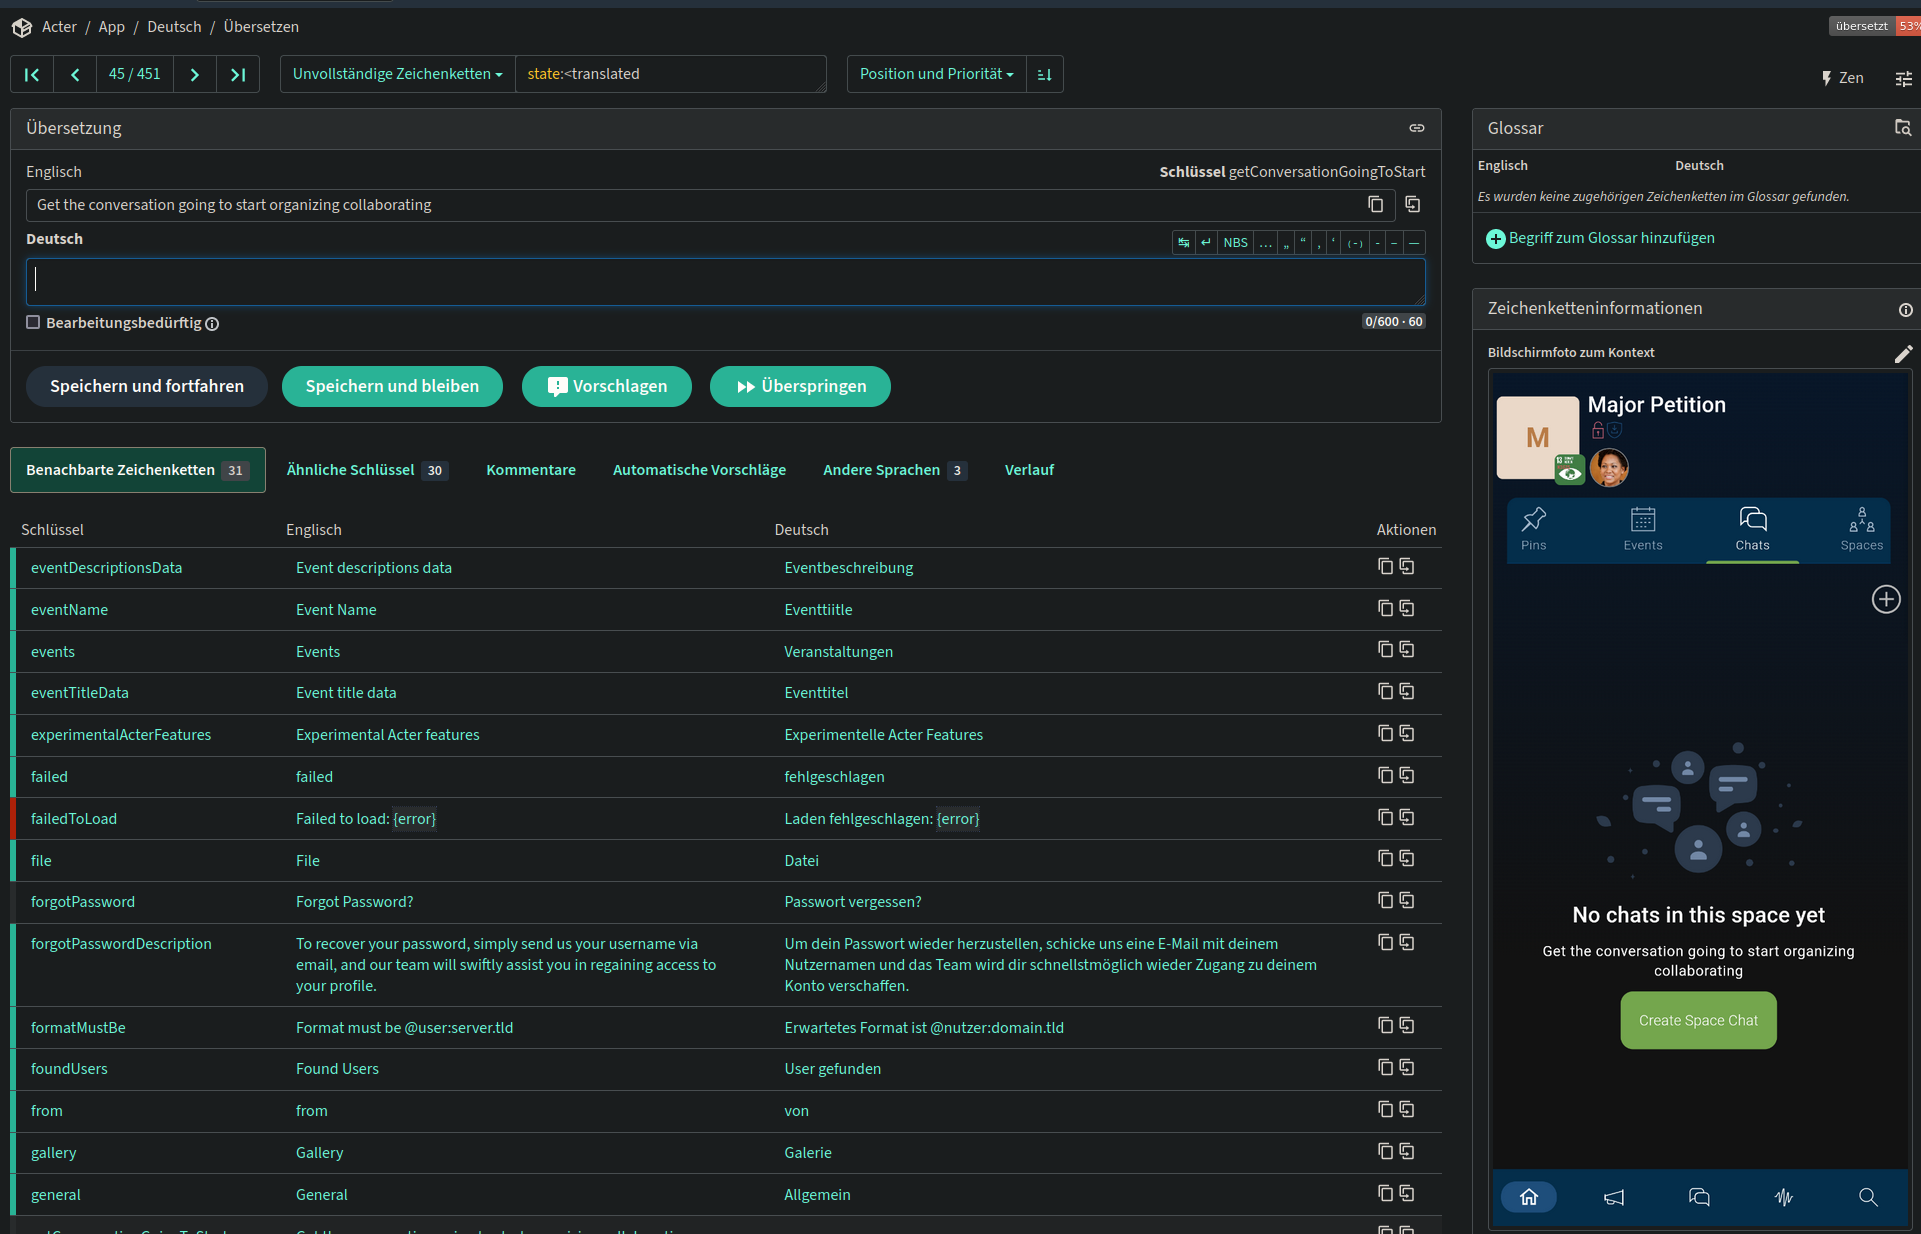
We have several strings in which we substitute in-app information into the string. These are annotated by {}around them, like in this example where we want to show the specific error message in the translation string:
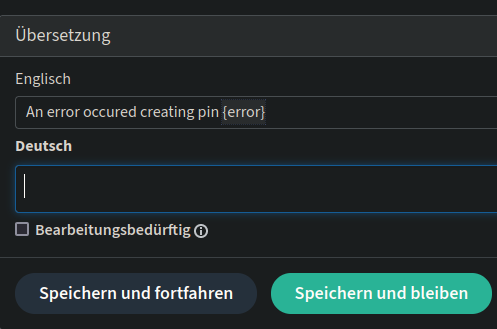
When you find these make sure that the translation contains all of them as well in a way that make linguistically sense for the language you are translating into. There can also be more than one of these in there. The Weblate editor will actually inform you about mistakes there or missing items. It’s important that you keep all of these placeholders in your translation, spelled the same way as they were in the English version. You can easily copy-paste them by pressing cmd/ctrl and then the number 1 for the first, 2 and so forth and the editor will directly add the same placeholder at the current cursor position
The Glossary highlights
Sometimes you’ll find a word or context highlighted in the original string like this:

In those situations take a peak to the right and you’ll see why: this word had been added to the glossary - a special “project” within Acter that stores common terms and how they are to be translated for consistency. In this case you can see that we agreed to translate “Account” in German with “Konto” (out of a few potential versions). This allows you to make sure you keep using a consistent language even when multiple people contribute to the same translation.
Add a glossary term
To add a term to the glossary (which is most useful at the start of the translation) just click the “ + Add to glossary" action in the glossary field and you’ll be presented with a dialog to add a source and its translation.
Adding App Screenshots
Sometimes it can be tricky to understand where a string appears and thus what a proper translation for it would be. For that the app allows to add further context (the second box on the right in the screenshot above) where you can also add a Screenshot to the source string. We recommend doing that whenever you had trouble understanding where something was used and then looked it up: just make a screenshot when you found it and upload it into the weblate to make it easier for the others.
More questions answered
How much % to be included?
As we are at very start of this journey but it should also be actually helpful we are currently including all languages that contain at least 50% of strings translated. With less than that it is rather questionable to call that a translated app as more string would be English than the translated language. Over time, however, we are hoping to increase this threshold to ensure high quality translations all the time.